Saturday, November 27, 2010

If at first you don't succeed, FAIL AGAIN~

If at first you don't succeed with hand sewing, grab a friggin' beast like this. This sewing machine is older than I am, and was purchased at Montgomery Ward, a store that hasn't existed for at least 15 years. But man, it still works great~
So I found another pattern that I wanted to try, and it seemed much easier to follow. Hell, I didn't even have instructions for it, I just copied it from some work gloves I use.
Here is my polandball glove finished. I took a bunch of shots but they're all terrible, even this one. The first glove set i did was awful, a ton of missed sizes on things, missed stitching, but I knew what to fix.
And look, it's mah claw! I made these out of primo! sculpey, and I currently have eight ready to go and mount on my finished glove.
Woot! This one turned out much better, and stronger, and tighter in fit, and much cooler. I'm ready now to work on much better cloth.

Sunday, November 21, 2010

Lessons Learned - My tailoring skill is 1~

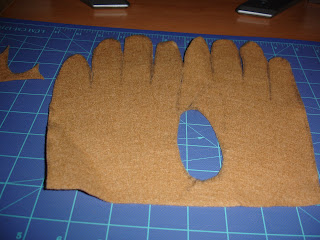
So, I decided to approach my panda gloves by using the old fashioned method of sewing, and since I had no idea how to do it, I was learning on the fly. Here is my first sheet of fabric!
Here is my first working. There were a few things I did wrong, one was the entire glove didn't wrap around my fat hand, two, the fingers weren't uniform in width, length, or shape. And the hole for my thumb was too large.
So I restarted with a piece of blue fabric, and allowed for a lot more working space with everything. I stitched it lightly so I could work with it better.
Here it is around my hand.
So this one worked out a lot better, I finished the thumb, as you see above, and attached it. However I found that the stitching I used was terrible for what I was doing, and that the cloth would stretch and rip easily, so it fell apart easily.
Here it is flipped inside out, it looks good for what's done, but honestly, I have no idea how I'm going to attach the rest of the stuffing and fur to it, or at least re-plan it so it works. So I've decided to take another approach and see how that works out. I was looking forward to doing it this way because I could make sure the glove was as cool as possible, but shit happens. My second method will be much easier though.

Sunday, November 14, 2010

The Adventure Begins - Defrosted in the Microwave of Evil

I attached the metal cap on, then painted over it to hide all the imperfections that happened whilst attaching it.
Hot glue gunning the fur onto the edge of the hat.
The finished product, and trust me, it looks amazing.
The hat on my human head.
A look from a higher point! It's done, I'll have to do some changes later on to make sure the hat doesn't fall off of my head randomly. That'll be done after I finish my panda head.

Friday, November 12, 2010

The Adventure Begins - Reheated in the Microwave of Evil

So, after the second coat of stain, I ended up with something like this. I got overzealous and put too much stain on the wood, so I had to sand it.
And the final product was this, probably the most accurate color shot I've gotten, but you can see the difference in the coloring and sheen.
1x1 galvanized steel, what ducts are made out of, will be the material for my cap.
I cut it out to a circle, and started to make incisions in the side of the circle to create the little upward cusp you see at the edge of the metal on the reference work.
This is the final product of the work, blacksmithing it out, cutting the 8 holes for the screws, and the tiny piece so I can make it into a cone.
Just holding it in place so I can mark where to drill the holes on the hatMy intense concentration.
My extreme aggravation.

A cool shot from the side.

The cap in place, this will be finished tomorrow after a coat of polyurethane on the wood and a few coats of paint on the metals.
Overall I'm impressed that it turned out as well as it did, I guess good prep and planning helped a lot, and I'm looking forward to starting my next parts of the project, the feet and the gloves.

Also, I recommend visiting this.
Enjoy ^_^

Sunday, November 7, 2010

The Adventure Begins - Part Two~

November 7th - It was a day like any other day, but a sun day, so I needed something to protect my face from the sun, stat. So I needed to strike an epic pose, and begin working.

Coolie Hat construction complete.
A close-up of the emblem I etched out.
A layer of stain was applied in the wee hours of the night, the color is off due to flash not giving it justice, but I'll get a daytime picture of the finished product eventually.
I love doing work after the house goes to sleep, everything is silent, and the only sounds you hear are your own breathing and your brush strokes. It's great to have uninterrupted peace time.

Saturday, November 6, 2010

The Adventure Begins~


November 5th - Oh joyous joy, the funds to purchase materials wasn't there, so my plans were delayed. I received the check later in the day, and set out to purchase materials.

Here is me with the boards of pine for the coolie hat~

November 6th - The work begins after class.
This is the trusty jigsaw that will tear through my pine~

Two pieces completed.

Eight pieces completed.

All pieces completed.
At this point, I've tapered all the inner edges of the boards by 6 degrees with trusty Bertha, the precision saw you see with her feet in the shot. I've glued all the pieces together, and tomorrow I'll make the last piece for the gap, and that's where the claw icon will be dug in. The total of this portion of the project took about 4 hours to complete.

Oh, I also retrieved the bamboo staff early in the morning. Great success.

Wednesday, November 3, 2010

Coolie Hat Version Paper.0 and Cad.0


Alright, so finally down to designing the actual model. I made a paper sized replica to scale to help myself build it in my mind. I found that creating the paper model eased a lot of my worries, including size, construction, cost and difficulty. I've been obsessing about how to make this hat for the past week, constantly running over my head the best way to approach it and finish the project, but actually sitting down and completing the measurements to scale, the drawings and the calculations, I was able to figure it out.

I found out that the shrinkage of radius for this hat is directly related to the height you want to go to, so the numbers crunched out evenly, and a 26'' diameter flat, will become a 5'' high hat at peak, with a 24'' diameter. I counted 11 pieces on the figurine model of the hat, and since they weren't uniform in shape, I decided to make arbitrary widths for each panel. There is some curvature to each drawing I've seen of the hat, but I figure it won't be an issue since I'll have to taper the interior edges of each panel, I can just glue it all together and sand the shit out of it until it's more rounded. Hopefully if time permits on Friday, I'll be able to start the wood construction of it, finish it, and stain it so that on Saturday, I'll be able to polyurethane it early in the morning and get to work on finishing touches like the aluminum, bolts, and fur.

Tuesday, November 2, 2010

The Goal


I haven't filled you guys in on what exactly I'm trying to build, so I'll post the reference images here.